View Invoice Details
Overview
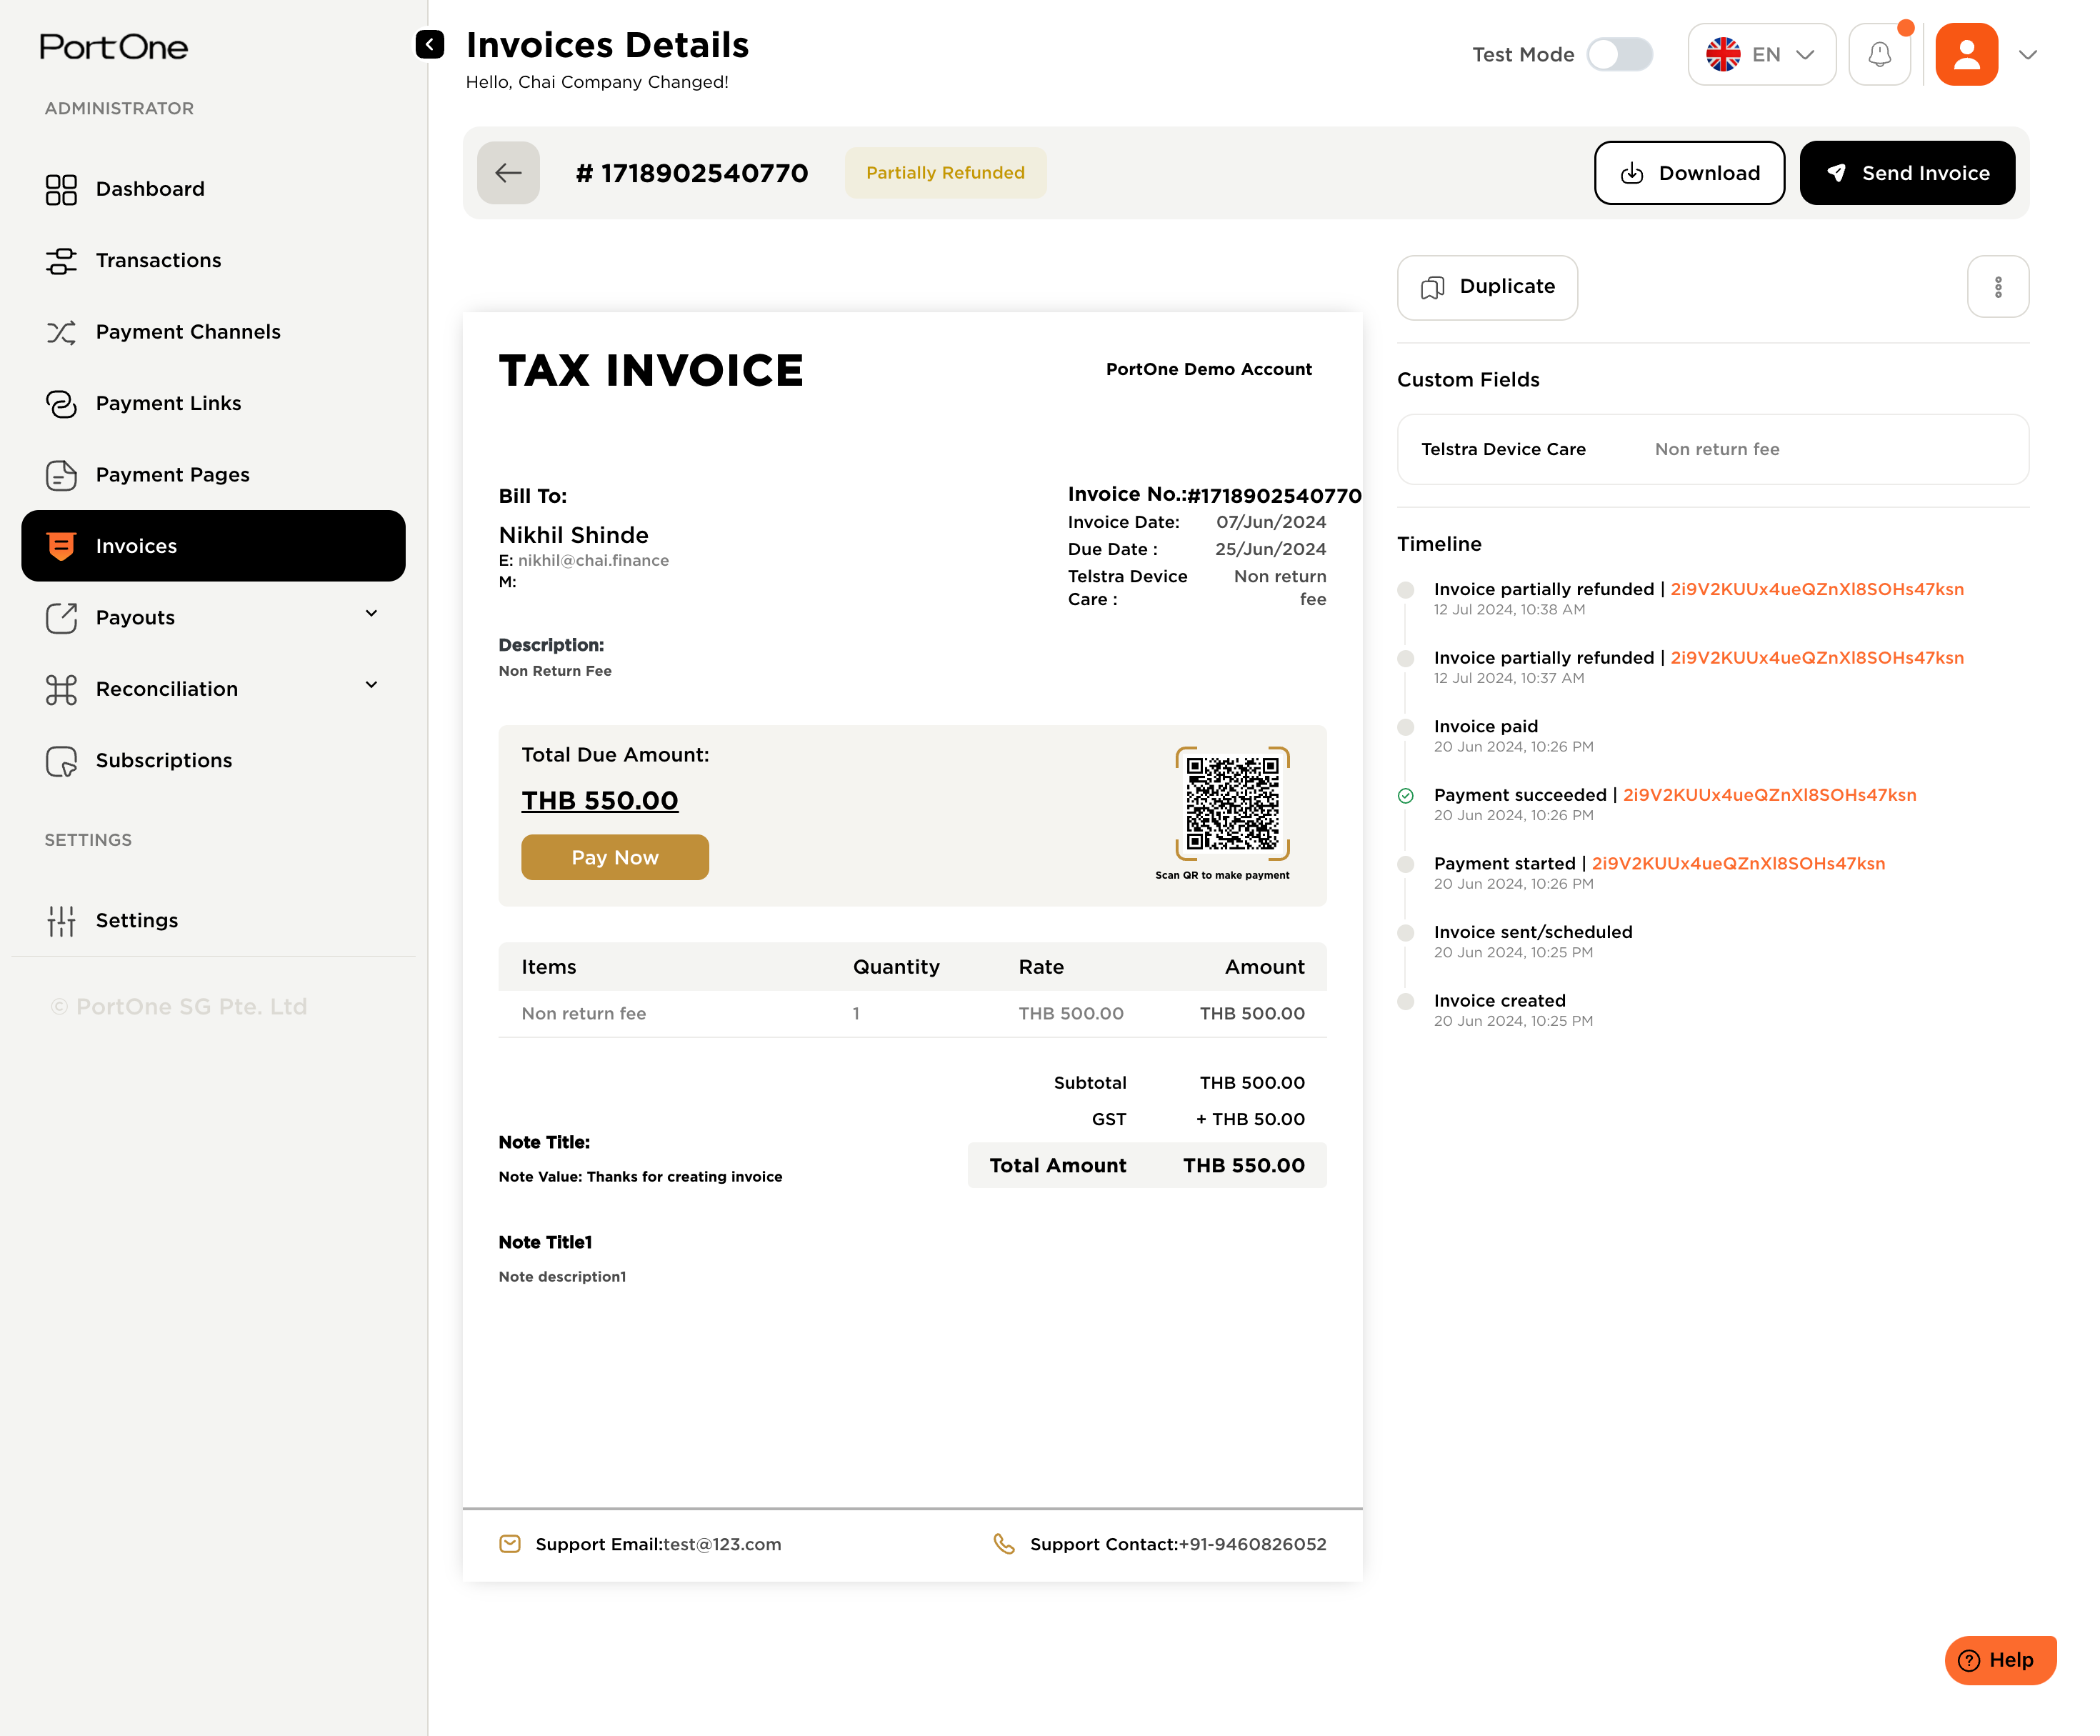
The Invoice Details page in the PortOne Admin Console provides an in-depth overview of each invoice, allowing administrators to review, manage, and take necessary actions. Below is a guide on how to navigate and understand the key components of the Invoice Details page.

Accessing the Invoice Details Page
- Login to PortOne Admin Console: Use your credentials to log in.
- Navigate to the Invoice Section: From the side menu, select Invoices.
- Select an Invoice:
- Browse or search for the desired invoice from the list.
- Click on the invoice number to open the details page.
Invoice Details Overview
The page is divided into two main sections:
Invoice PDF Preview (Left Panel)
This section provides a PDF-like preview of the actual invoice as the customer sees it. Following are the key details:
- Bill To: Displays the customer's name, email address, and phone number.
- Invoice Number: A unique identifier for the invoice (e.g.,
#1718902540770). - Invoice Date and Due Date: Mentioned clearly for tracking payment timelines.
- Description: Short description of the invoice (e.g., Non-return fee).
- Payment Details:
- Total Due Amount: Shows the total amount due, with a "Pay Now" button for immediate payment.
- Line Items: A detailed breakdown of items/services, including:
- Item description.
- Quantity.
- Rate.
- Subtotal.
- Taxes/Additional Charges: Listed separately (e.g., GST).
- Grand Total: The final payable amount after applying taxes and discounts.
- Custom Fields and Notes:
- Custom fields configured for the invoice, like "Telstra Device Care".
- Additional notes (e.g., "Thanks for creating invoice").
Admin Tools Actions (Right Panel)
- Send Invoice: Re-send the invoice to the customer.
- Download: Generate a PDF version of the invoice for offline use or sharing.
- Duplicate: Quickly replicate the invoice for similar transactions.
Custom Fields: - View and edit any custom fields configured during invoice creation.
Timeline (Right Panel)
A chronological record of all actions taken on the invoice, including:
- Invoice Created: Date and time when the invoice was generated.
- Invoice Sent/Scheduled: Timestamp for when the invoice was sent or scheduled for dispatch.
- Payment Started/Successful: Records the customer’s payment activities.
- Invoice Paid: Confirms payment completion.
- Partial Refund/Refund: Displays details if any refunds (partial or full) were processed.
Additional Features
- Customer Support Contact Information:
- Email and phone numbers for support inquiries are displayed at the bottom.
- QR Code for Payment:
- A scannable QR code for instant payment is embedded in the invoice.
- Status Tag:
- The current status of the invoice (e.g., Partially Refunded, Paid, Overdue) is prominently displayed.\
- The current status of the invoice (e.g., Partially Refunded, Paid, Overdue) is prominently displayed.\
How to use the Invoice details page?
- Track Payment Status: Quickly check if the invoice is paid, overdue, or refunded.
- Manage Customer Queries: Use the timeline to address customer concerns about invoice delivery or payment.
- Download or Resend Invoices: Ensure customers have access to their invoices through download or email.
- Audit Logs: Utilize the timeline for audit purposes to understand invoice lifecycle events.
This intuitive interface ensures seamless invoice management and enhances businesses' administrative workflow.
Updated 5 months ago
