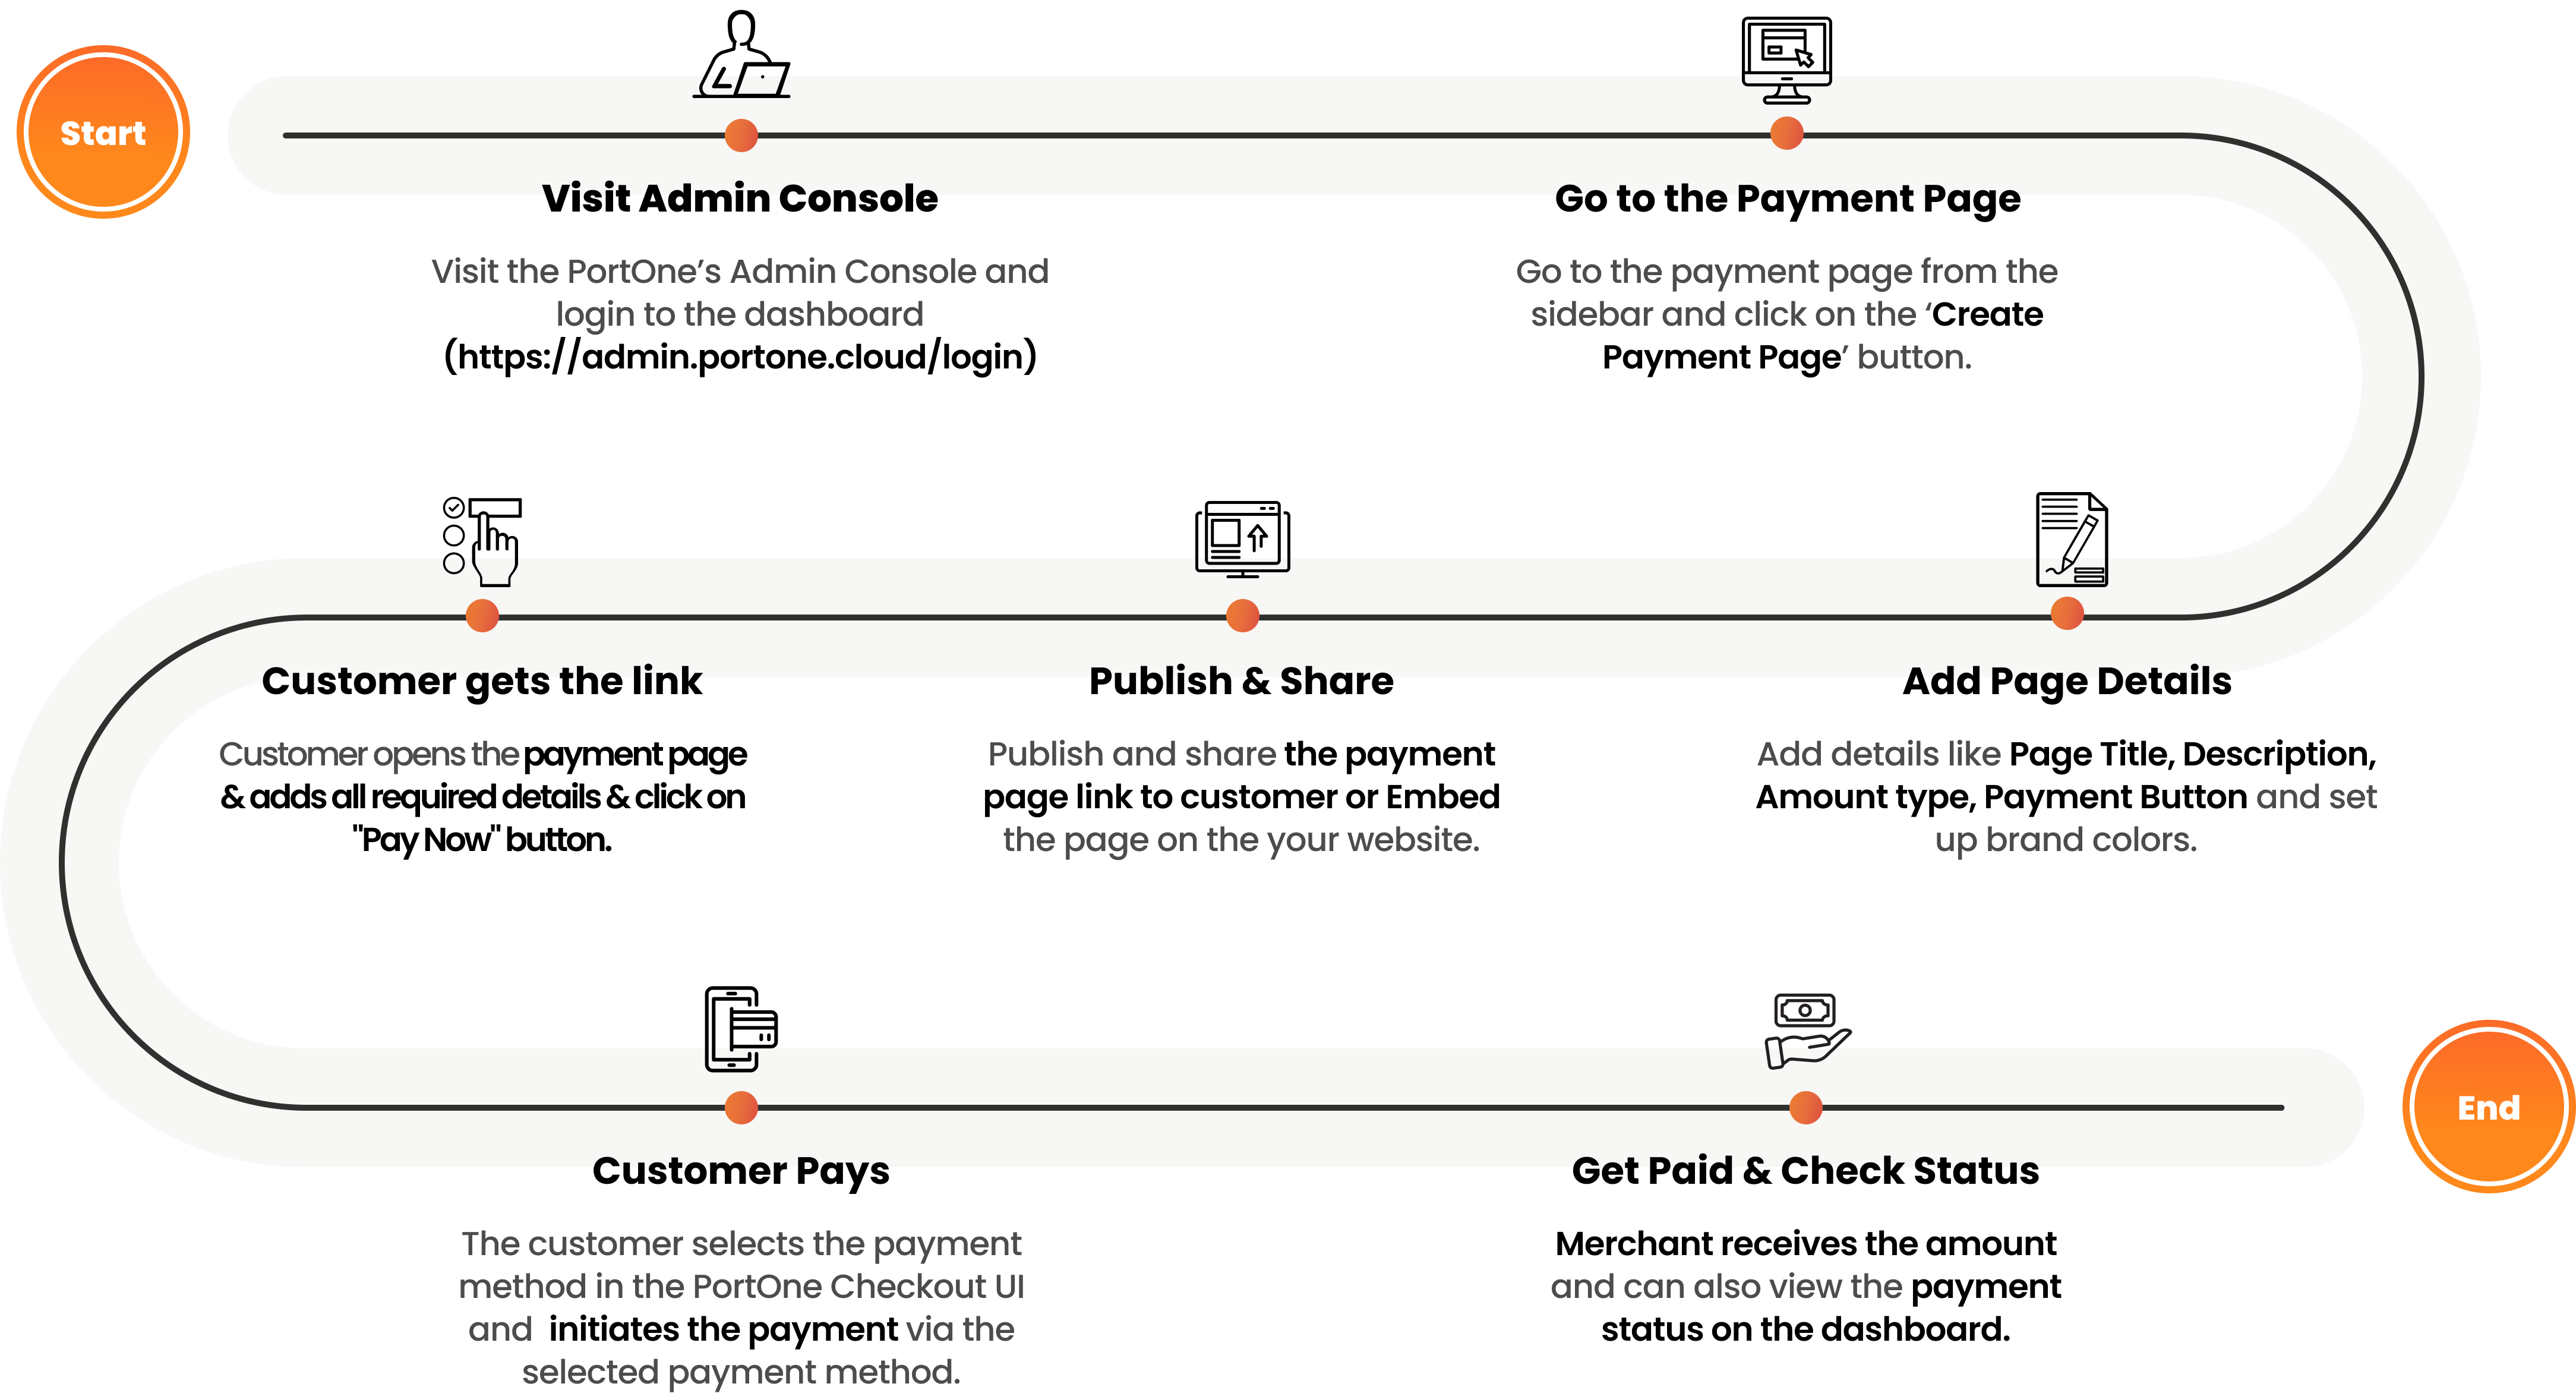
Creating a Payment Page
Steps to Create a Payment Page using PortOne Admin Console
Step 1: Open the Payment Page Tab
- Navigate to the Payment Page Section:
- In the left-hand main navigation of the PortOne merchant portal, click on the "Payment Page" option.
- This will open the Payment Page window, where you can manage all your payment pages.
Step 2: Creating a New Payment Page
- View Existing Payment Pages:
- The Payment Page window displays a list of all the payment pages you have created.
Create a New Payment Page:
- To create a new payment page, click on the "Create Payment Page" button located in the top right corner of the page.
- After clicking the button, a new screen will appear where you can choose the theme and type of payment page you wish to create.
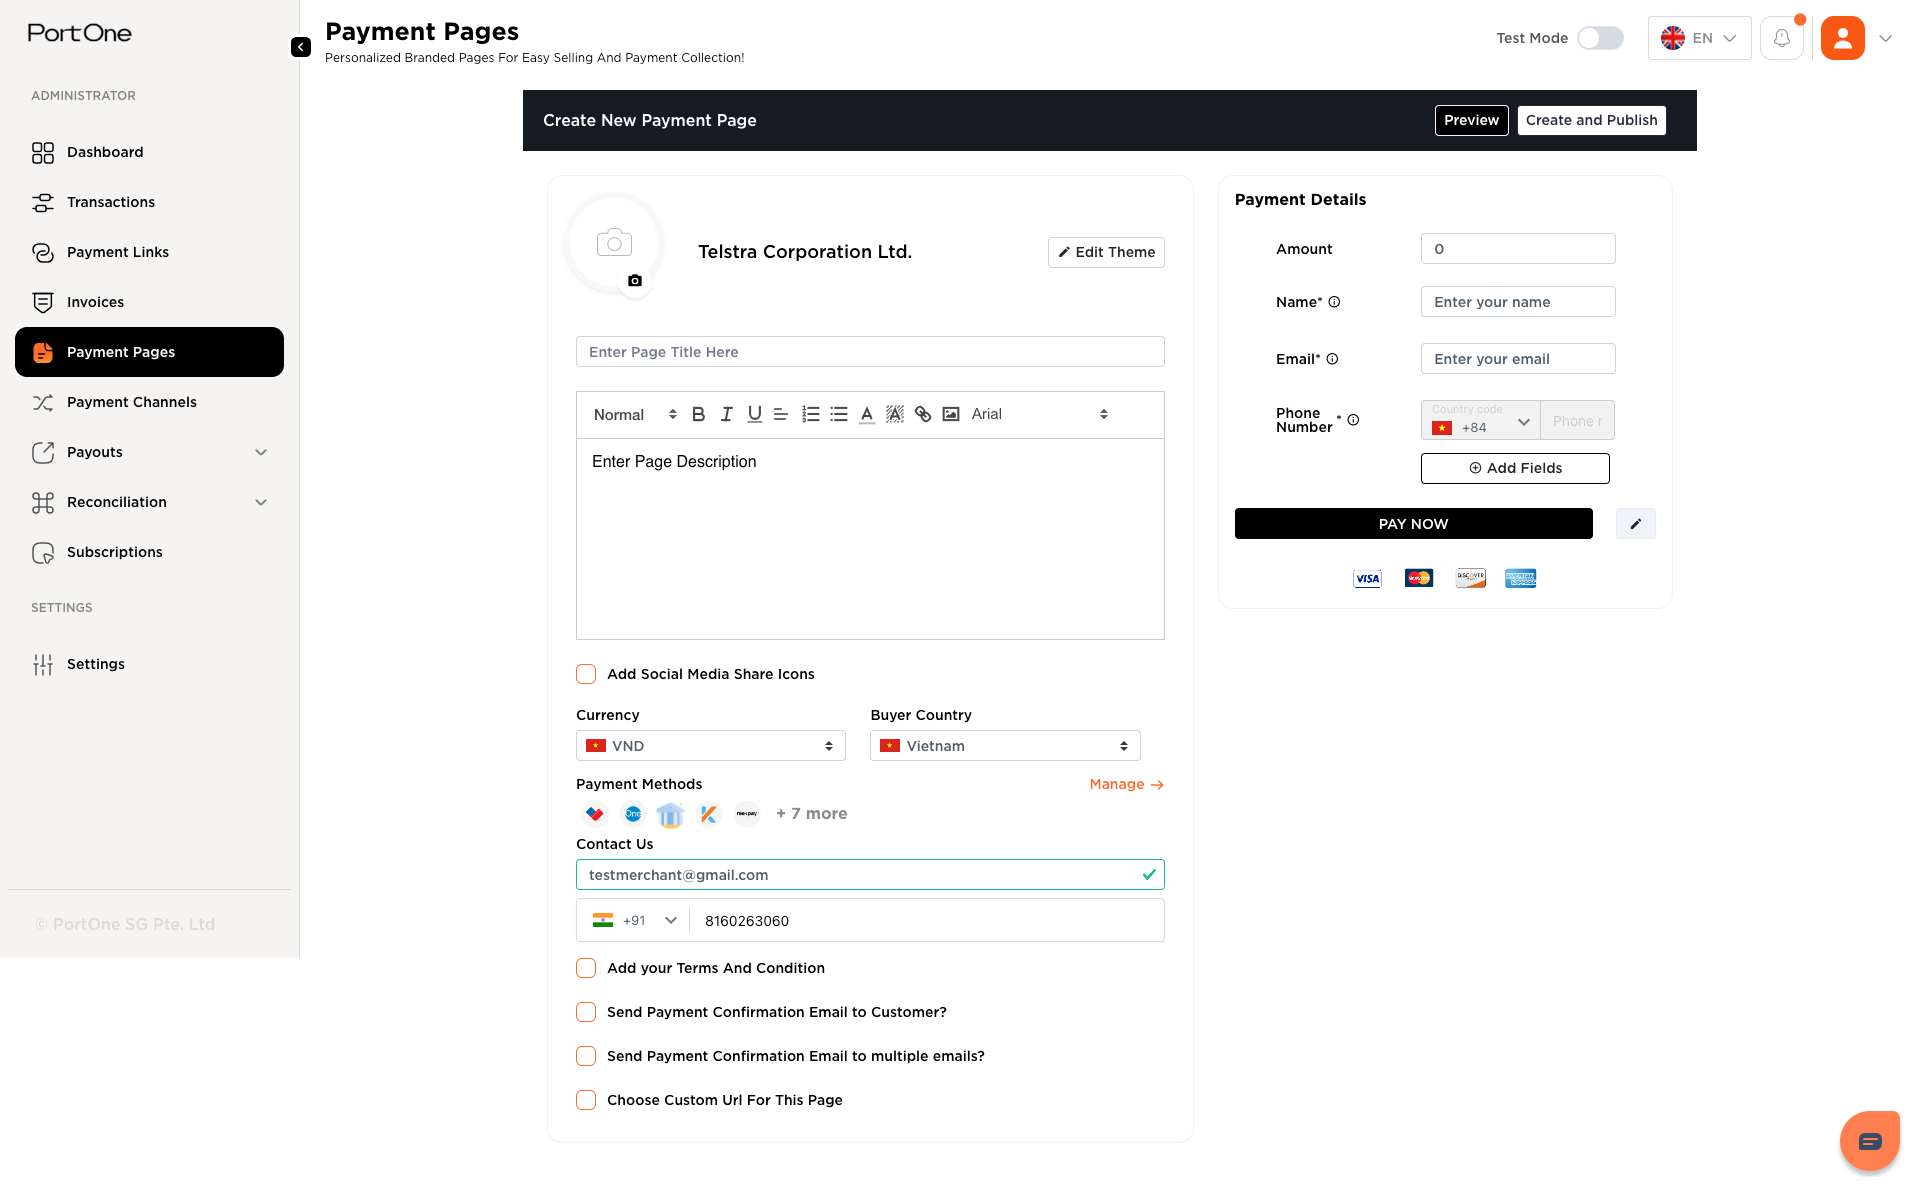
Step 3: Configuring Page Details
-
Fill in Product and Payment Details:
- You will need to fill in two essential sections: Product and Other Details, and Payment Details.
-
Add Logo and Theme:
- To add your organization's logo and select a brand theme:
- Option 1: Click on the logo image beside the name (e.g., Raj Malhotra).
- Option 2: Navigate to "Account Settings" in the side menu.
- After selecting the logo or theme, these will be visible on the payment page and other products like payment links or checkout UI.
- To add your organization's logo and select a brand theme:
-
Enter Page Information:
- Add the Title of the page, Description, Contact Details (email and phone number), and Terms & Conditions, if applicable.
- You can also include a link and image in the description section of the payment page creation screen.
Step 4: Adding Payment Details
-
Customize Payment Information:
- On the right-hand side of the screen, customize the following:
- Amount: Specify the type of amount and description.
- Payment Button Label: Define the text visible to customers on the payment button.
- Additional Options: Add any descriptions or mandatory fields such as Name, Email, and Phone.
- On the right-hand side of the screen, customize the following:
-
Add Custom Fields:
- You can add more fields to collect additional data from the customer. For example, let’s add a "Website URL" as a mandatory field.
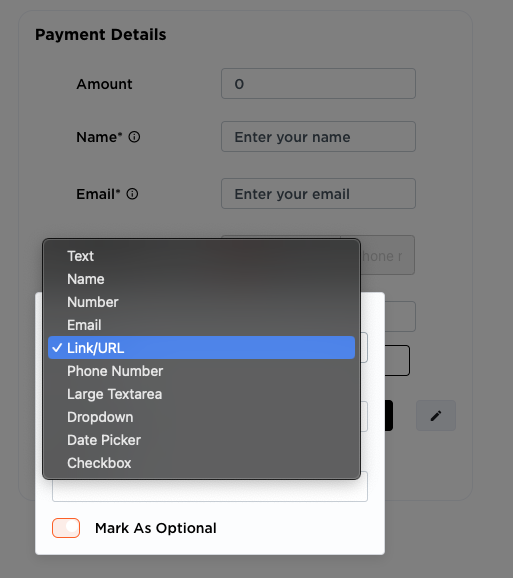
- Click on the "Add Fields" button and select "Link/URL" in the drop-down menu as the Field Type.
- Add the label for the field as "Website URL."
- Set as Mandatory by clicking on the "Mark As Optional" checkbox. This ensures that this field is marked as mandatory for collecting the necessary data from the customer.
-
Manage Page Settings:
- The page settings button is located in the top right corner of the Payment Page creation screen. After clicking it, a window opens up with the following options:
- Set a Custom URL: Define a custom URL for your payment page.
- Setup Contact Details: Setup your contact detials like email address and phone number that will be displayed on Payment Page
- Set Page Expiry Date: Define an expiry date after which customers can no longer make payments through the page. You can reactivate the page at any time.
- Action After Successful Payment: Choose the checkboxes like
Send Payment Confirmation Email to Customer?Send Payment Confirmation Email to multiple brokers?
- The page settings button is located in the top right corner of the Payment Page creation screen. After clicking it, a window opens up with the following options:
-
Save Changes:
- Once all fields are configured, click the "Preview" button and review the UI & other misc details of the Payment Page
- Once the preview is done & configuration is approved, click the "Create and Publish" button, You'll receive the link to the newly created Payment Page which you can share with the customer or embed on your product website.
Step 5: Publishing the Payment Page
- Publish the Payment Page:
- After completing all edits and additions, publish the payment page.
- You can track the payment status on the respective pages.
This documentation outlines the essential steps for creating a Payment Page using the CHAI Dashboard, guiding users through setup, customization, and publication.
Updated 10 months ago
Did this page help you?